In the Moodle template, participants can be divided into groups. The group function can be confusing and cause conflicts with course settings, so this is only recommended for advanced users. With groups, you can define group-specific restrictions for the course activities and create individual groups.
1. Creating a group
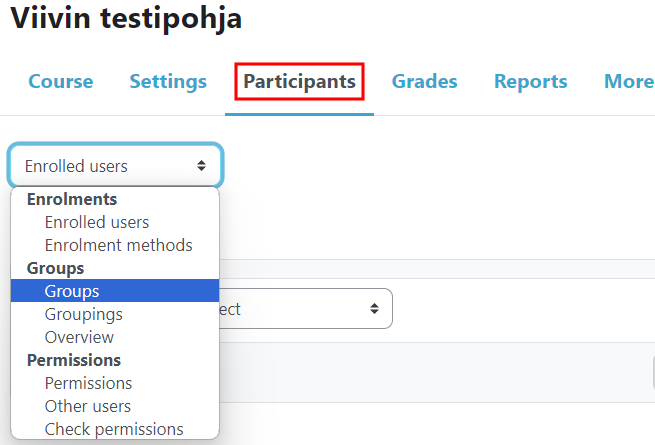
The groups can be found in the course under Participants:
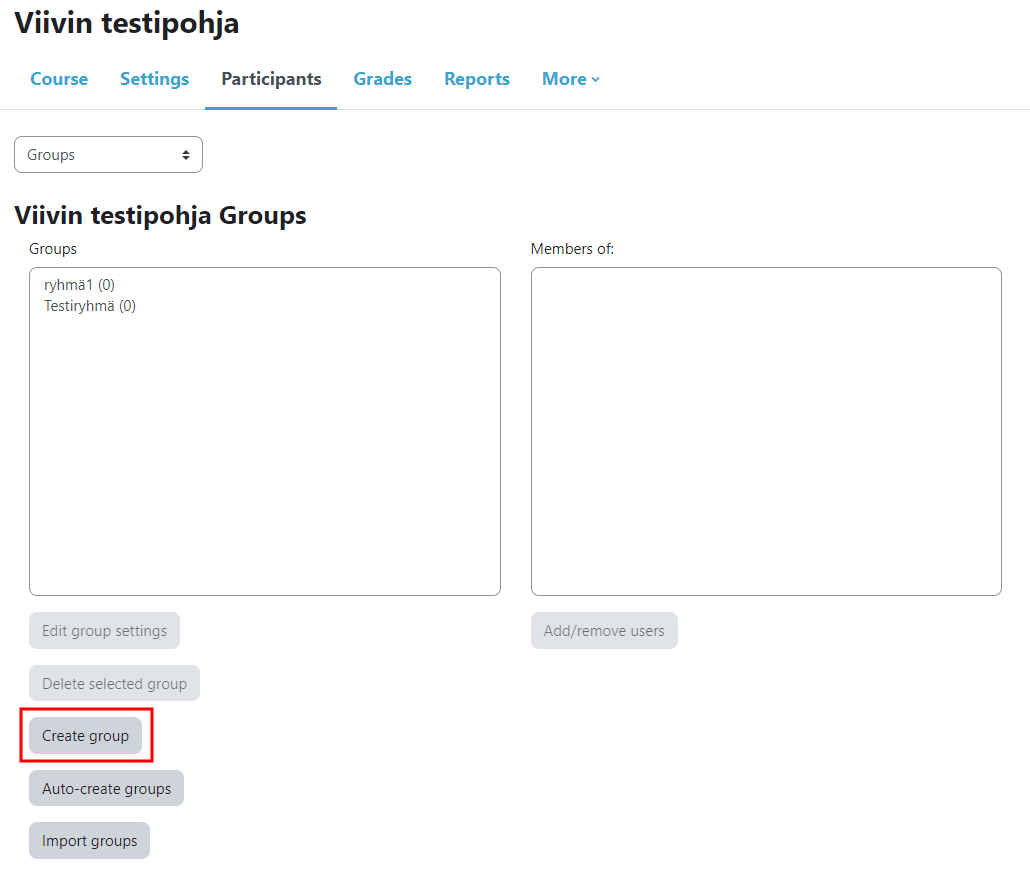
You can create a group by pressing Create group -button.
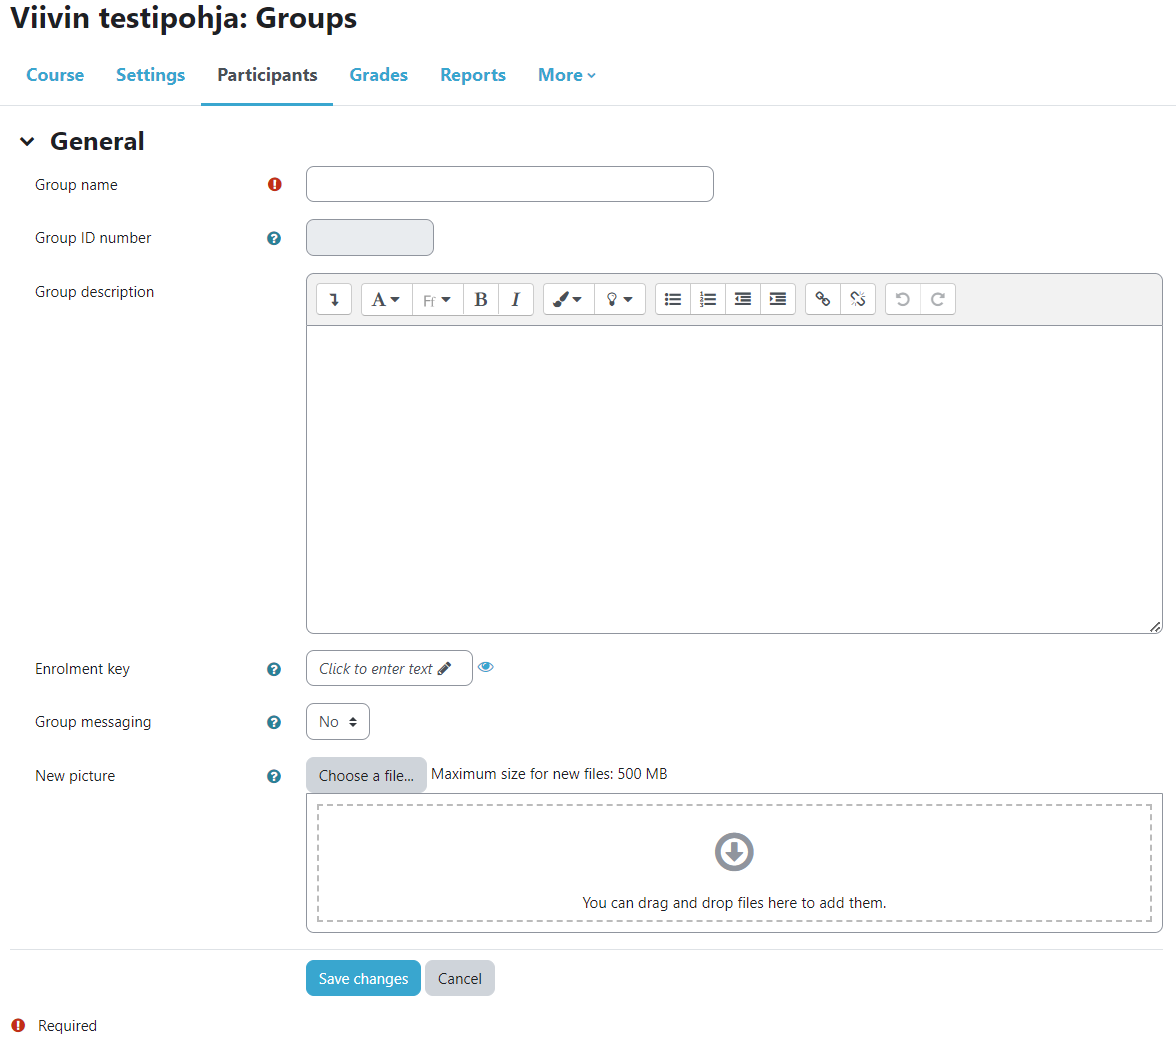
Give the group a name and if you wish, add a description and a group key. After that, press Save changes.
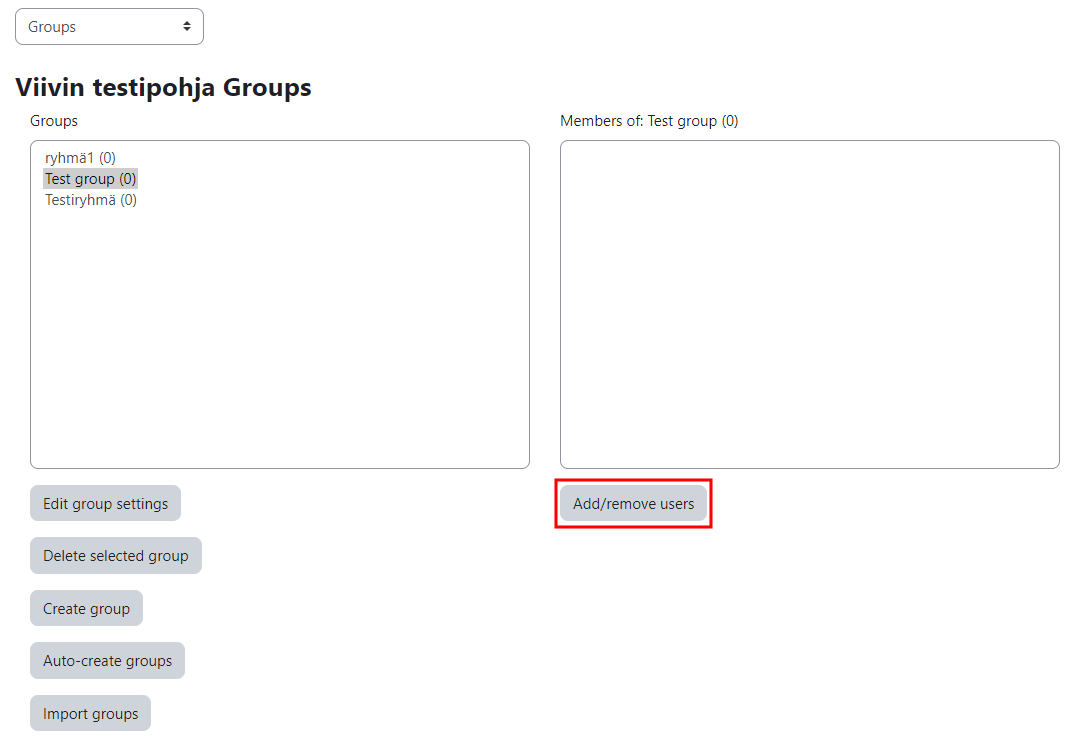
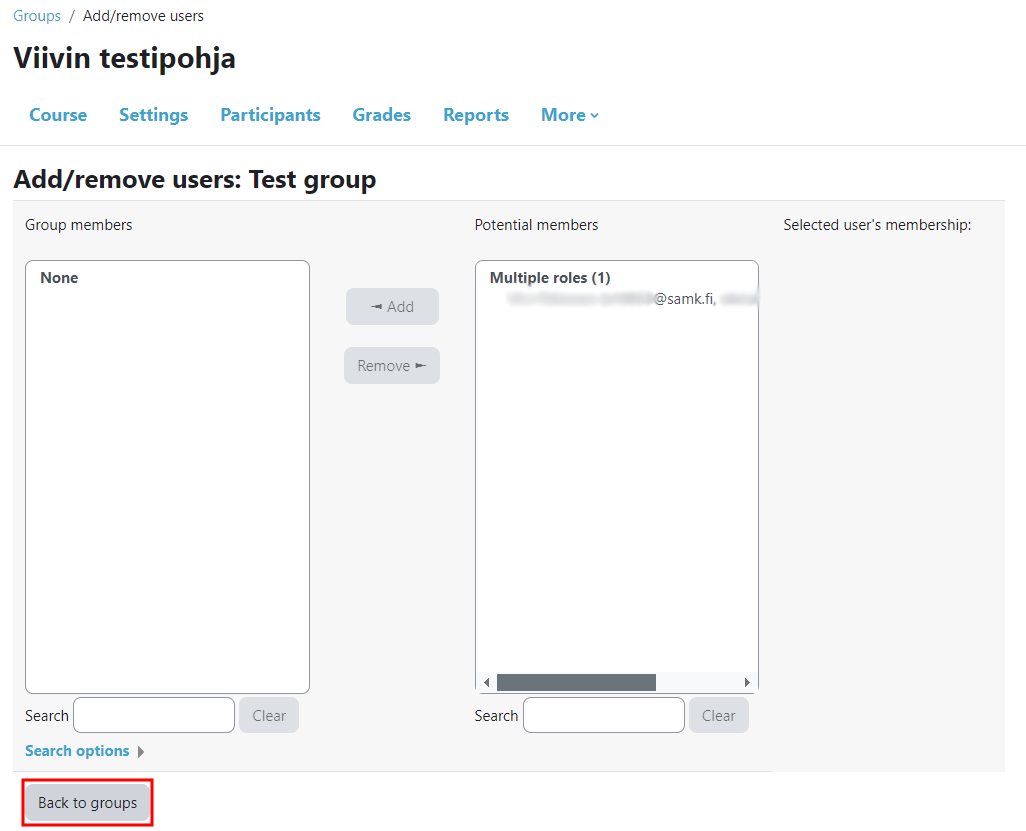
You can add users to the group using the Add/Remove Users button, which is now active because the group has been created.
After adding / removing users, you can go to the previous view by clicking the Back to groups button.
2. Using group in activities
You can enable group mode in the course activity settings, under Common module settings:
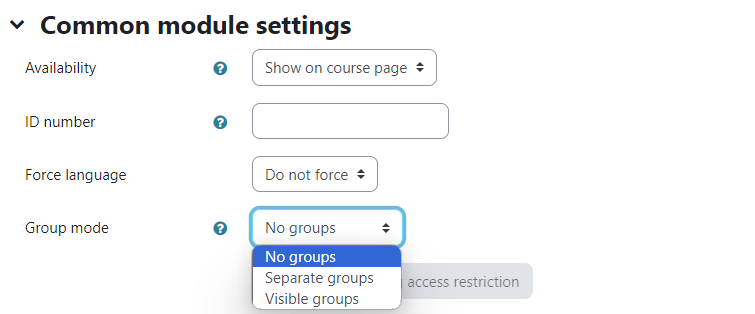
Possible group modes:
- No groups – All participants together.
- Separate groups – the participant can only see the members of their own group and the contents produced by it.
- Visible groups – Participants are divided into groups where each one works, but the results of the work are also visible to other groups.
If the group mode is for example Separate groups, grouping is required for which the activity in question is only visible. By selecting Visible groups, the activity for all groups is shown separately. For example, groups in the discussion area activity would only see their own group’s activities.
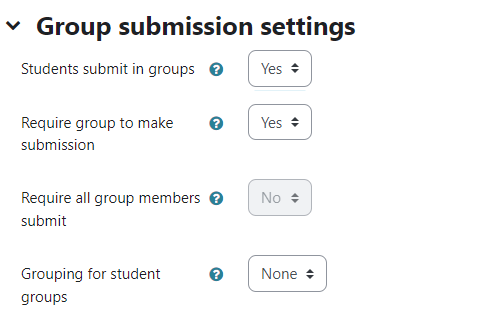
If the students return group work, the group work return option is selected from the activity settings:
3. Groupings
A kind of ”group of groups” – so you can form different entities from individual groups.
By grouping, you can offer participants even more versatile opportunities to work with different people. These groupings are defined in the same place as the groups, in the Groups menu on the Groupings tab.